Stock Icons for Pitch Decks and Presentations: Elevating Visual Communication

In today’s fast-paced business environment, a compelling pitch deck or presentation can make the difference between capturing attention and losing it. Visual clarity and consistency are essential, and stock icons have become a key design element in achieving both. Whether you are presenting to investors, clients, or internal teams, using well-designed icons can enhance understanding, reinforce branding, and create a professional impression.

The Role of Stock Icons in Presentations

Stock icons are simplified graphic representations used to communicate ideas quickly and effectively. In pitch decks, they serve as visual cues that help audiences process information faster. Instead of relying solely on text, icons allow presenters to break down complex concepts into digestible visuals.

For example, icons can represent business growth, financial metrics, marketing strategies, or product features. When used correctly, they reduce cognitive load and make slides more engaging.

Concept of New Smartphone With Black Icons Vector

Benefits of Using Stock Icons

Improved Visual Clarity
Icons help organize content and guide the viewer’s attention. A well-placed icon can instantly communicate a message that might otherwise require several lines of text.

Enhanced Professional Appeal
Consistent icon styles contribute to a polished and cohesive design. This is especially important when presenting to stakeholders or investors who expect high-quality visuals.

Time Efficiency
Designing icons from scratch can be time-consuming. Stock icon libraries provide ready-to-use assets, allowing you to focus on content and storytelling.

Cost-Effective Solutions
Many platforms offer affordable or even free options, making it possible to access high-quality visuals without overspending. Searching for cheap images alongside icon sets can help you build a complete presentation design on a budget.

Choosing the Right Stock Icons

Selecting the appropriate icons is crucial for maintaining a professional look. Not all icons will suit every presentation style or audience.

Consistency in Style
Stick to a single icon style—whether flat, outline, or filled—to ensure visual harmony across slides.

Relevance to Content
Choose icons that clearly represent your message. Avoid abstract or overly decorative designs that may confuse your audience.

Scalability and Format
Vector icons (SVG, AI, EPS) are ideal because they can be resized without losing quality. This ensures your presentation looks sharp on any screen.

Customization and Branding

While stock icons are pre-designed, customization is essential to align them with your brand identity. Adjust colors, sizes, and positioning to match your presentation theme.

For instance, applying your brand’s color palette to icons can create a unified visual language throughout your pitch deck. Small adjustments like line thickness or icon spacing can also enhance readability and overall design quality.

Licensing Considerations

Before using stock icons in commercial presentations, review the licensing terms. Most stock platforms allow icons to be used in presentations, but restrictions may apply if you plan to redistribute or sell the design.

Ensure that your chosen icons come with a commercial-use license, especially if your presentation will be shared publicly or used in client work. Keeping a record of your asset sources is a good practice for long-term compliance.

Best Practices for Effective Use

Limit Overuse
Using too many icons can clutter your slides. Focus on key points where visuals add value.

Pair Icons with Text
Icons should support your message, not replace it entirely. Combine them with concise text for clarity.

Maintain Alignment and Spacing
Consistent placement ensures a clean and professional layout.

Conclusion

Stock icons are a powerful tool for enhancing pitch decks and presentations. They improve clarity, save time, and contribute to a professional visual identity. By selecting high-quality assets, customizing them to fit your brand, and ensuring proper licensing, you can create presentations that are both visually appealing and highly effective. Even when working with cheap images, thoughtful design choices can elevate your message and leave a lasting impression.

30 Adorable Photo Ideas with Your Dog: Creative Poses & Props for Perfect Pictures

Taking pictures with our furry companions has become a cherished way to capture special moments and create lasting memories. Whether it’s for social media sharing or personal keepsakes we all want to showcase the unique bond we share with our four-legged friends.

We’ve gathered creative and fun photo ideas that’ll help you capture stunning images with your canine companion. From seasonal photoshoots to action-packed adventures these tips will transform your ordinary dog photos into frame-worthy masterpieces. Plus you’ll discover how to use simple props lighting techniques and camera settings to bring out your pup’s personality in every shot.

Top Picture-Perfect Poses With Your Dog

Capturing the perfect pose with your dog creates lasting memories that showcase your special bond. Here are proven poses that transform ordinary pet photos into frame-worthy shots.

Classic Side-by-Side Shots

The side-by-side pose establishes a natural connection between you and your dog in photos. Position yourself at your dog’s eye level sitting or kneeling directly next to them. Face the camera at a 45-degree angle with your shoulders while keeping your dog’s face forward. For added personality, try these variations:

  • Place your arm around your dog’s shoulders
  • Rest your head gently against theirs
  • Sit cross-legged with your dog in your lap
  • Stand shoulder-to-shoulder in matching outfits
  • Kneel beside them in matching poses

Action Shots During Play Time

  • Toss a favorite toy and photograph mid-catch
  • Sprint together through an open field
  • Jump simultaneously for matching aerial shots
  • Play fetch with flying discs or balls
  • Chase bubbles together in natural light
  • Roll in autumn leaves or spring flowers
  • Splash together in shallow water

Seasonal Photography Ideas

Seasonal changes create distinct backdrops for capturing memorable photos with dogs. Each season offers unique elements that enhance the visual appeal of pet portraits.

Summer Beach Photos

Beach photography with dogs captures the essence of summer fun through playful interactions with sand, waves, and natural lighting. Position your dog near the waterline during golden hour (sunrise or sunset) for optimal lighting conditions. Create dynamic shots by photographing your dog:

  • Running through shallow waves
  • Digging in the sand
  • Playing with beach-safe toys
  • Sitting together on beach rocks
  • Leaving paw prints along the shoreline

Fall Foliage Portraits

Autumn’s vibrant colors provide a stunning natural backdrop for dog portraits. Select locations with concentrated leaf coverage to maximize the seasonal impact. Enhance fall photos by:

  • Positioning your dog among scattered red maple leaves
  • Capturing them mid-leap through leaf piles
  • Framing shots with overhanging golden branches
  • Creating contrast between dark-coated dogs and bright foliage
  • Including pumpkins or gourds as seasonal props
Season Best Time to Shoot Key Elements
Summer Golden Hour (5-8 PM) Ocean waves, sand texture, sunset colors
Fall Mid-morning or Late Afternoon Red, orange, yellow leaves, natural diffused light

Creative Props and Accessories

Props and accessories transform ordinary dog photos into captivating memorable moments. These elements add personality and charm to pictures with your dog ideas while creating engaging visual stories.

Holiday-Themed Photo Sessions

Holiday-themed props create festive photo opportunities throughout the year. Position your dog with holiday-specific items:

  • Christmas: Red bows santa hats tinsel garlands string lights
  • Halloween: Pumpkins witch hats spooky decorations cobwebs
  • Valentine’s Day: Heart-shaped signs pink balloons rose petals
  • Easter: Pastel eggs woven baskets bunny ears spring flowers
  • Fourth of July: American flags patriotic bandanas sparklers

Matching Outfits and Costumes

  • Color-coordinated accessories: Matching bandanas bowties scarves
  • Sports team gear: Team jerseys hats supporter scarves
  • Seasonal attire: Winter sweaters summer Hawaiian shirts rain coats
  • Special occasion wear: Formal bowties tutus wedding accessories
  • Adventure gear: Hiking backpacks camping equipment outdoor wear
Prop Category Examples Best Use Cases
Holiday Items Santa hats flags Seasonal photos celebrations
Everyday Props Toys balls blankets Casual lifestyle shots
Adventure Gear Backpacks leashes Outdoor activity photos
Fashion Items Bandanas bowties Style-focused portraits

Location Ideas for Dog Photography

Selecting the perfect location enhances the visual impact of dog photos while showcasing your pet’s personality. These diverse settings create engaging backdrops for memorable pictures with your dog.

Urban Settings and Cityscapes

Urban environments offer distinctive backdrops for modern dog photography. Position your dog against brick walls, colorful murals or graffiti art to create striking contrasts. Incorporate architectural elements like:

  • Stairways leading to elevated viewpoints
  • Historic building facades with ornate details
  • Industrial warehouses with textured surfaces
  • Public parks with city skyline views
  • Pedestrian bridges spanning waterways
  • Cobblestone streets in historic districts

Natural Outdoor Backdrops

Natural settings provide timeless backgrounds that complement your dog’s appearance. These locations offer varied textures colors:

  • Forest trails with filtered sunlight
  • Meadows filled with wildflowers
  • Rocky outcrops overlooking valleys
  • Lakeshores with reflecting waters
  • Mountain vistas during sunrise
  • Beach settings at golden hour
Setting Type Best Time to Shoot Key Features
Urban Early morning, sunset Less foot traffic, soft lighting
Parks Golden hour Natural elements, open spaces
Beaches Sunrise, sunset Dynamic backgrounds, natural light
Forests Mid-morning, late afternoon Dappled light, natural framing

Each location presents unique opportunities to capture pictures with your dog in their element. Focus on spots that match your dog’s energy level energy level frame their best features.

Capturing Special Moments

Special occasions create perfect opportunities for memorable photos with dogs, adding depth to life’s milestone celebrations. Here’s how to capture these cherished moments effectively.

Birthday and Anniversary Photos

Dog birthdays present unique photo opportunities with themed decorations like party hats, bandanas or “doggy cakes.” Position your dog near birthday props such as numbered candles matching their age or celebratory banners. Create a photo series capturing their reaction to opening presents or tasting their special treats. Set up a dedicated photo area with:

  • Custom-made birthday signs featuring your dog’s name
  • Colorful balloon arrangements placed safely behind them
  • Party streamers hung at appropriate heights
  • Pet-safe party props like bow ties or birthday crowns

Family Portrait Integration

  • Symmetrical arrangements with the dog centered among family members
  • Multi-level poses with some family members seated while others stand
  • Action shots of the family playing with or walking the dog
  • Candid moments during family activities like picnics or garden time
Portrait Type Best Setup Key Elements
Formal Group Indoor studio/neutral backdrop Coordinated outfits, professional lighting
Casual Family Outdoor natural setting Natural poses, interactive moments
Holiday Cards Themed background Seasonal props, matching accessories
Milestone Events Location-specific Event-related decorations, meaningful props

Technical Tips for Dog Photography

Mastering the technical aspects of dog photography transforms ordinary snapshots into stunning portraits. These essential techniques enhance image quality while capturing your dog’s unique personality.

Camera Settings and Lighting

Professional dog photography requires specific camera settings to capture clear, sharp images. Set your camera to a fast shutter speed (1/500 or faster) to freeze motion during active moments. Use aperture settings between f/2.8 and f/4 to create a beautiful background blur while keeping your dog’s features sharp. Position yourself at eye level with your dog using natural light sources:

  • Morning light (7-9 AM): Creates soft illumination perfect for outdoor portraits
  • Golden hour (1 hour before sunset): Produces warm tones ideal for beach shots
  • Overcast days: Provides even lighting without harsh shadows
  • Window light: Offers gentle indoor illumination for intimate portraits
Lighting Condition Best Camera Settings ideal Time
Bright Sunlight f/8, 1/500, ISO 100 7-9 AM
Golden Hour f/4, 1/250, ISO 400 1 hour pre-sunset
Overcast f/2.8, 1/250, ISO 800 Any time
Indoor Window f/2.8, 1/125, ISO 1600 10 AM – 2 PM

Getting Your Dog’s Attention

  • Squeaky toys: Position them near the camera lens
  • Treat pouch: Keep it accessible but out of frame
  • Sound makers: Use small bells or clickers
  • Hand signals: Establish clear visual cues
  • Tennis ball: Hold it near the lens
Attention Method Best Use Case Duration of Effect
Squeaky Toys Action Shots 30-60 seconds
Treats Posed Portraits 15-20 seconds
Sound Makers Group Photos 10-15 seconds
Hand Signals Formal Portraits 5-10 seconds

Conclusion

We hope these creative photo ideas inspire you to capture unforgettable moments with your furry friend. Whether you’re snapping seasonal shots planning holiday-themed sessions or exploring new locations together there’s no shortage of opportunities to document your special bond.

Remember that the best photos happen when both you and your dog are comfortable and having fun. With the right preparation props and techniques you’ll create lasting memories that showcase your pup’s unique personality and charm.

Now it’s time to grab your camera gather some treats and start your photography adventure with your four-legged companion. Your perfect shot is waiting!


Simple Guide: How to Design an Eye-Catching Poster (Step-by-Step Tutorial)

Creating a standout poster design can feel overwhelming, especially when you’re staring at a blank canvas. I’ve learned that the key to crafting an impactful poster lies in keeping things simple and focused, rather than cramming every design element possible onto one page.

When it comes to poster design, I’ve discovered that less is more. A clean, well-organized layout helps your message shine through without overwhelming your audience. Whether you’re promoting an event or showcasing your creative skills, the right balance of text and visuals can make the difference between a forgettable design and one that captures attention and drives action. I’ll show you how to create eye-catching posters that communicate effectively, whether they’re destined for print or digital display.

Understanding Your Poster’s Purpose

A poster’s effectiveness stems from a clear understanding of its core purpose. Establishing mission, vision, and goals before starting the design process creates a foundation for successful visual communication.

Defining Your Target Audience

Target audience identification shapes every aspect of poster design. Consider these key demographic factors:

  • Age groups determine font size and visual style choices
  • Education levels influence content complexity and terminology
  • Cultural preferences affect color schemes and imagery selection
  • Location relevance impacts language and local references
  • Social interests guide design elements and tone

Setting Clear Objectives

Clear objectives drive measurable poster outcomes. Focus on these essential elements:

  • Primary message placement in the top third of the poster
  • One prominent call-to-action instead of multiple competing ones
  • Essential information hierarchy (what, when, where, how)
  • Visual elements that support the core message
  • Text-to-image ratio of 40:60 for optimal engagement
Design Element Recommended Size
Title Font 48+ point
Heading Text 36-40 point
Body Text 24-30 point
Title Length Max 2 lines

The poster design process becomes straightforward when objectives align with audience needs. Each visual element serves a specific purpose in communicating the message, eliminating unnecessary clutter that distracts from the core content.

Essential Design Elements

Creating an effective poster design requires mastering three fundamental elements that work together harmoniously. Here’s how to incorporate these elements into your poster design process.

Layout and Visual Hierarchy

A balanced layout organizes information in order of importance, guiding viewers through the content naturally. Create visual hierarchy by:

  • Positioning key elements strategically on a grid system
  • Using size contrast between primary headings (twice the body text size) and supporting content
  • Incorporating white space to separate distinct content areas
  • Balancing symmetric or asymmetric elements for visual interest
  • Placing the most important information at eye level

Typography and Text

Typography establishes the poster’s personality while maintaining readability. Select fonts by:

  • Limiting typeface choices to 2-3 complementary fonts
  • Using display fonts for headlines
  • Selecting serif or sans-serif fonts for body text
  • Creating clear contrast between text sizes
  • Maintaining consistent spacing between letters and lines
  • Keeping small text at least 10pt for legibility

Color Theory Basics

Color choices influence mood and message retention. Apply color effectively by:

Color Scheme Type Description Best Use Case
Monochromatic Various shades of one color Clean, professional look
Complementary Opposite colors on wheel High-impact contrast
Split Complementary One base + two adjacent colors Balanced visual interest
Analogous Three adjacent colors Harmonious, cohesive feel

This structure outlines the essential design elements needed to create an effective poster while maintaining simplicity and visual appeal in the design process.

Creating Your Design

A successful poster design starts with strategic planning and thoughtful arrangement of visual elements. The design process focuses on creating a harmonious balance between content and space to maximize visual impact.

Starting With a Simple Sketch

A basic sketch establishes the foundation for an effective poster design. I recommend using a grid system to divide the space into distinct sections: 40% for title and text content, 30% for graphics and 30% for white space. This initial layout helps visualize the placement of key elements before committing to digital design.

Choosing Images and Graphics

Images and graphics enhance the poster’s visual appeal while supporting the main message. Select high-resolution images that:

  • Complement the text content
  • Match the color scheme
  • Maintain consistent style throughout
  • Occupy approximately 30% of the total space
  • Support rather than overshadow the message
  • Reserve 30% of the poster area for white space
  • Place adequate spacing between elements
  • Create clear borders around content sections
  • Use consistent margins throughout
  • Allow text blocks room to breathe
Poster Element Recommended Space Allocation
Text & Title 40%
Graphics 30%
White Space 30%

Design Principles to Follow

Effective poster design relies on fundamental principles that guide visual communication. Here’s how to implement these core design elements for maximum impact.

Maintaining Simplicity

Simple poster designs communicate messages more effectively than cluttered layouts. A clean design incorporates:

  • Clear spacing between elements to create breathing room
  • Limited font choices (2-3 maximum) for consistency
  • Strategic use of white space to enhance readability
  • Focused messaging with essential information only
  • Balanced distribution of text-to-image ratio (40:60)

Creating Visual Contrast

Contrast commands attention through deliberate opposing elements:

  • Light vs. dark color combinations for text legibility
  • Size variations between primary and secondary content
  • Different font weights to establish information hierarchy
  • Shape diversity to create visual interest
  • Textural elements against solid backgrounds
  • Prominent placement of key information at eye level
  • Size differentiation to emphasize important elements
  • Color emphasis on critical message components
  • Leading lines to direct visual flow
  • Alignment patterns to organize information hierarchy
Element Distribution Percentage
Title & Text 40%
Graphics 30%
White Space 30%

Pre-Production Checklist

Here’s my organized checklist of essential preparation steps to initiate a simple poster design. Proper planning ensures the final product meets both technical requirements and creative objectives.

Sizing and Format

A poster’s dimensions affect its readability and visual impact. The standard poster sizes include 18×24 inches, 24×36 inches or A-series formats (A3, A2, A1). I set my canvas size in pixels at 300 DPI for print projects to maintain sharp details or 72 DPI for digital displays. Common file formats include:

  • PDF for print-ready files with embedded fonts
  • PNG for digital display with transparency support
  • JPEG for web sharing with smaller file sizes
  • AI or PSD for editable source files

Print vs Digital Requirements

Digital and print posters have distinct technical specifications:

Print Requirements:

  • CMYK color mode for accurate color reproduction
  • 300 DPI resolution minimum
  • 0.125-inch bleed area around edges
  • Convert fonts to outlines
  • Export as press-ready PDF
  • RGB color mode for screen display
  • 72 DPI resolution
  • Web-safe fonts
  • Smaller file sizes (<5MB)
  • Multiple formats (JPG PNG) for different platforms
Format Type Resolution Color Mode File Size
Print 300 DPI CMYK >20MB
Digital 72 DPI RGB <5MB

Conclusion

I’ve learned through experience that creating an impactful poster doesn’t need to be complicated. By following these fundamental design principles and maintaining a clear focus on the message I want to convey I can craft posters that truly resonate with my audience.

The key to success lies in thoughtful planning organized layouts and strategic use of visual elements. When I stick to these guidelines while keeping simplicity at the forefront I’m able to create designs that not only look professional but effectively communicate my intended message.

Remember: a well-designed poster speaks volumes without saying too much. I encourage you to take these principles and make them your own.


Automatically Insert WordPress Photo with PixelRockstar

Do you want to save a lot of time doing the things you love? Managing a wordpress website or social media outlet can take up some of your time. You need something that will help you free up some of your time working. You need – PixelRockstar. This plugin provides high quality, legally safe wordpress photo for your website and social media.

There are four main reasons why you should consider PixelRockstar as your wordpress photo source:

  • It’s easy to use. PixelRockstar provides high quality images easy and quick. Optimized images, with SEO-friendly captions, are inserted automatically in your posts.
  • It’s safe to use. With PixelRockstar, you can avoid the legal risks of using free images from the internet. All images come with a Digital License, which is specifically designed for digital use.
  • It’s affordable. PixelRockstar offers the best prices for wordpress photo in the market. Starting at only $0.57 per image, you can download the photo you need to compete your creative projects.
  • It’s shareable. Some image sources do not allow you to share the images to social media. You need to get a difference or a different image size to use the image successfully. With PixelRockstar, you can use the images in social media outlets as well as your wordpress posts.

Are you looking for photos for your wordpress? PixelRockstar has over 4 million high quality images in its library. You can search and add the media you need to your articles and social media posts in just a few seconds. The photos you download are yours to use forever, too. So be legally safe with PixelRockstar.

With the photo plugin, you can have more time doing the things you love. Your images are just seconds away. So, stop wasting valuable time and install PixelRockstar. Download up to 2000 pixels with no additional fees.


How to Buy Cheap Stock Photos for Your Website

Typing any keyword on Google and grabbing the images that are appropriate for your project is a good idea if you want to face a lawsuit. Artists and photographers today are getting savvier in protecting their rights. One copyrighted picture in your blog can lead to a big bill through the post any day. You may think that it’s unlikely to happen, but it could! In this case, it is better to buy cheap stock photos here to dodge the bullet.

Where can you buy cheap stock photos?

buying-cheap-stock-photosYou can purchase cheap stock photos from a microstock agency. Typically, you buy credits rather than purchasing individual images. You then use that credit to purchase the images you want. For instance, one image costs 3 credits. You can use the credits to choose any image in any size you need. Some microstock agencies offer larger images for a higher cost. But, others offer images of any size for the same rate.

Why use cheap stock photos?

When you buy cheap stock photos, there are certain restrictions you have to follow. They usually cover the way you intend to use the image you buy. As you would expect, you cannot resell the image and claim it as your own. You can, however, use it as part of a larger project. There are also specifications on how many copies you can make – depending on the type of license you purchase the image with. Most of all, you cannot use the images with model and property releases to depict sexual, political and religious matters.

Despite these restrictions, it is still best to purchase cheap stock photos because of the protection they come with. You do not have to worry about facing a big bill from a copyright lawsuit once you use images on the front page of your blog. In case you get in trouble, you have a document to show that you purchased the rights to that image. As long as you adhere to the restrictions stipulated in the license agreement, you don’t have to think about the copyright police chasing your back.

Free sites exist, but they do not offer a guarantee of legitimacy. When you buy cheap stock photos, you can be protected from legal issues that may arise in the future. You do not want to pay for a large bill just because you want to save a few dollars, do you? And besides, microstock photos are not expensive. They can range from $1 to $15 each. When you subscribe to a plan or purchase a larger credit pack, you can even buy them for a less than a dollar in some stock sites.

Before download a free photo and use it on your website, ask yourself: Are you sure you want to take the risk of paying thousands of dollars just to save a few?

Dollar Photo Club Alternative for Bloggers and Web Designers

blogger-2Bloggers and web designers need more images to complete their creative projects. They require a subscription plan that provides them with adequate images to fill their creative needs. That’s why the Dollar Photo Club was a favorable image source. It is cheap, allowing to download as many as they need, without braking the bank. With the DPC closing, they need a Dollar Photo Club alternative that offers fairly the same kind of product or a bit more.

The Dollar Photo Club is closing for good on April 15, 2016, which leaves a good number of members in search for their primary image source. Blogger and web designers will be some of the major has-beens in the process. Fortunately, there is a better alternative in town. Stock Photo Secrets introduces 99 Club, the Dollar Photo Club alternative that offers a similar kinds of product – plus, more! DPC members and non-members alike have an equal chance of getting this special offer.

Here are some of the reasons why you should consider 99 Club:

  • 200 images for $99 per year. If you are a blogger or a web designer, it is highly likely that you need more images than an average creative user. 99 Club allows you to download 200 images for only $99 a year. If you need more, you can always purchase additional images for only $0.99 each. With this very affordable rate, you can complete as many projects as you need without spending so much.
  • High resolution and royalty-free. The stock photo website’s images are available in high resolution and royalty-free license. You can use them in any project for as long as you like. The images are available in various sizes – small, medium and XXL – so you can confidently use them in print. They also so not have expiration so you can download and use them forever!
  • 99 Club is here to stay. The stock photo website is not associated with the Dollar Photo Club or Fotolia. It is a stock sites by Stock Photo Secrets, which has been around for over ten years. It will not be closing anytime soon, saving you from the heartache of losing your primary stock image bank once again.
  • No additional fees and auto-renew. Most stock photo websites have auto-renew compulsions. You need to cancel a month before your subscription ends if you wish to terminate. With 99 Club, you do not have to worry about it. It also does not involve additional fees. It is a one-time payment. You do not have to worry about anything but downloading.

dollar-photo-club-alternative

These are some of the features and benefits of choosing 99 Club as your Dollar Photo Club alternative. It is the best stock photo website for bloggers and web designers. With your deadline around the corner, two things you don’t need to worry about are auto-renewals and draining image downloads.

Why Should You Purchase Alamy Stock?

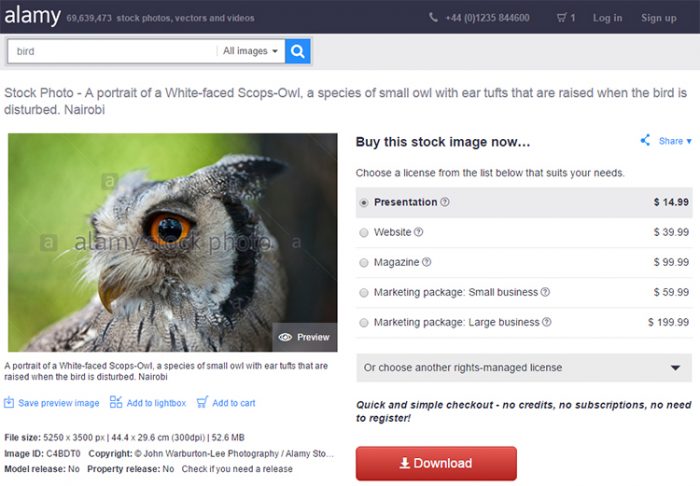
alamyA number of stock photo agencies are flooding the market. Each of them offers tempting features and plans that you can take anytime. So, what makes Alamy stock different than all of them? The stock site has a massive collection and tools to help users complete their project and educate them as well. Here is a short list of why graphic designers, bloggers and businesses like you should choose Alamy over other stock photo agencies.

  • Compelling Imagery. Alamy stock provides a compelling way for you to create amazing designs for advertising and promotional materials. It gives you access to over 65 million of high quality stock images from all around the globe. You can purchase and download the images individually, saving you from hefty subscription plan prices and other hidden fees.
  • Budget Friendly. Since Alamy does not require you to register or purchase any subscription plan, you can purchase the image in a much lower price. While this may be a bad option for people who needs more images in a regular basis, this is perfect for those who only require a handful. Alamy stock provides an inexpensive alternative to hiring a professional photographer as well.

  • alamy-imagesQuality Images. 
    Most stock photo sites’ reputation is based on the quality of the photos they sell. The world’s largest stock photo collection does not disappoint too. It offers millions of high quality stock images for every budget and project. The images are pre-screened for content, quality and uniqueness. With Alamy, you can be sure that you are getting quality images for your creative projects.
  • Time Savings. Like most stock photo agencies, Alamy stock offers time savings to designers, bloggers and businesses. A photoshoot of even the simplest requires a lot of time, effort and, of course, money. Most times, it does not make sense to conduct one at all. Whatever you are looking for, Alamy’s massive collection will surely get you covered. This will help you cut time and budget, which you can spend on other important things.
  • Innovative. The stock photo website is also innovative. It consistently looks for ways to develop its website to improve user experience. In fact, the current website has successfully incorporated some key features that is useful for bloggers, web designers and one-time purchasers. It has also released an iPad app that opens up opportunities in the microstock market.

The list of reasons can go on and on. Alamy does not only sell stock images, but also educates their users through their website tools. The stock site helps you with using tools effectively. It also supports your need for communication and understanding through the stock photo glossary. Moreover, you can take image sizing and resolution lessons to help you get the perfect size and resolution for your projects.

A Behind-The-Scenes Look: An Adobe Stock Review

adobe-stock-reviewThere was a time not too long ago when photography was an industry where only an elite few had the ability to make a substantial living. That was about 30 years ago. Fast forward 15 years and we begin to see several microstock agencies pop up all over the Internet.

This turned the photography industry on its head as these microstock agencies were purchasing stock photos from photographers all over the world. A new age of digital photography was born.

When we look at the microstock agencies now, their libraries average over 40 million images.

To give you an idea of where Adobe Stock came from, we have to dig back a little further and talk about the inspiration for Adobe Stock: Photoshop.

The People Who Brought You Photoshop

A disconnect existed within the audiences of these microstock agencies. The people behind the most famous digital photo manipulation software Photoshop, Adobe, never offered a photo library of their own. Instead, Photoshop users had to import images into Photoshop from external sources. Although they could import photos that they took with their cameras, most of them chose to purchase stock photography from these microstock agencies.

Catering to the Creative Professional

Adobe has always had a different and unique audience. As the forerunner for digital creation and manipulation software, the majority of Adobe’s audience has always consisted of creative professionals. Creative professionals who have always used Photoshop were all-too-familiar with the fact that Photoshop is useless without importing raw material to work with in the form of a digital image.

Before the advent of cloud computing, Adobe’s software had to be paid for upfront before Adobe licensed it to an end user. That meant an investment of well over $1000 for single program – and people always bought more than just Photoshop. This equated to an investment of thousands of dollars.

Adobe’s Business Model Change

Thanks to cloud computing, Adobe changed their business model to make their software much more affordable for the average user. This Increase their user base by putting the possibility of becoming a legitimate paying user of Photoshop into the hands of people who don’t have a budget of thousands of dollars to invest in Adobe’s Photoshop software.

Adobe’s Creative Cloud
creative-cloud-of-adobe

Adobe no longer packages their software in neat little boxes for customers to purchase outright. Adobe now offers their software under the acronym, “SAAS,” which stands for, “Software-as-a-Service.” This allows them to charge a mere $20 per month for access to Photoshop. The difference is that access to Photoshop became a monthly obligation rather than purchasing it the software upfront and having that feeling of ownership.

Adobe integrated every one of their software titles into this new business model. Users were now required to create an Adobe account with their own credentials to sign in and use Adobe software. When Adobe rolled the service out, they called it the Creative Cloud.

The Acquisition of Fotolia
fotolia-homep-age

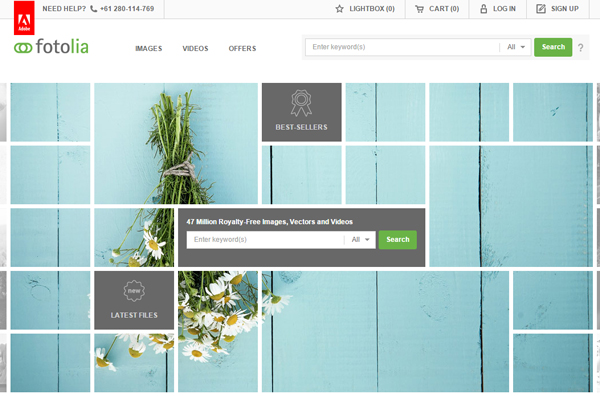
Adobe’s Creative Cloud was still missing the fundamental disconnect between photo manipulation software and the source of the photos. Adobe recognized this and went on the hunt to close the gap. In December 2014, they offered to purchase Fotolia for $800 million in cash. They now had access to an entire library of stock photos at their disposal. It took Adobe another six months to roll out Creative Cloud’s newest addition. In July 2015, Adobe introduced Adobe Stock (click here for Adobe Stock review from Stock Photo Secrets).

A Genius Business Decision

In the midst of Fotolia’s acquisition, Adobe made a genius business decision. Even though Adobe already had their Creative Cloud, they chose to do something unconventional. Under normal business expectations, Adobe was initially expected to dissolve Fotolia and integrate them into their Creative Cloud. Adobe decided against this and had since allowed Fotolia to exist as a separate business entity.

People don’t like change. Adobe read into that and decided that it would do more harm than good to force people to close their Fotolia accounts and migrate over to the Creative Cloud. By allowing Fotolia to exist separately from Adobe, the value of the company skyrocketed.

Creative Cloud’s Newest Addition

Adobe Stock is a new service. It took Adobe six months from the acquisition of Fotolia to roll out Adobe Stock. It makes sense – Adobe Stock is not a program to be utilized separately from Adobe’s current software titles. Adobe had to fundamentally change how each software title worked so that they could integrate Adobe Stock into their software.

The Integration of Adobe Stock

The result was phenomenal. This new change enabled users of the Creative Cloud to acquire new photos from directly within their application. You see, the previous method of acquiring new photos from stock photo agencies was a tedious one. Users had to log in to their account with a third-party microstock agency. Once they found a photo that they were satisfied with, they had to purchase a license and download it. Only after the photo was saved to their computer were they given the option to import the photo into Photoshop to edit the picture.

Adobe turned this method upside down. By integrating Adobe Stock directly into their software titles, users can now shop for, purchase, download and import these photos without ever leaving the app. This new process enabled creative professionals to save hundreds of hours when working with their images.

Adobe’s Grand Reopening

Adobe has been planning a grand reopening for their users for quite some time. As Adobe’s newest software change in years, Adobe faced the task of spreading the news. With Photoshop and other software titles being much more affordable than they were in the past, coupled with the integration of a stock photo service built directly into the program, Adobe successfully more than doubled their customer base in a relatively short amount of time.

Get 10 Images for Free

adobe-stock-subscription

Adobe’s Grand Opening is still going on – but not much longer. Right now, you can get 10 images from Adobe’s stock library free of charge simply by creating a Creative Cloud account and adding Adobe Stock to your account.

Despite the incredible value the stock images added to any marketing strategy or to the projects of these creative professionals, people have arrived at the consensus that stock images are not cheap. This is especially true for services that provide libraries of quality. Adobe knew that if they did not purchase a quality library, the acquisition and significant operational change would hurt them more than it would help. Needless to say, the proof is in the pudding – Adobe Stock has a unique library with nothing more than high-quality photos.

The 10 images that Adobe is offering will not last forever. It is a limited-time offer as part of their grand reopening with Adobe Stock leading the way.

Bundle Services and Save

When you sign up for a Creative Cloud account, you’re given the option to bundle one or more of their software titles along with Adobe Stock. If you do the math, you’ll discover what an incredible deal this is. As part of the Creative Cloud, Adobe is offering Photoshop for $20 a month. By adding that to your Adobe Stock subscription, take special notice at how the pricing for Adobe Stock changes. By itself, Adobe Stock is not cheap. By adding one of their software titles, you may notice that Adobe will steeply discount Adobe Stock. In the end, you may actually be paying less by bundling services than you would if you were to sign up for Adobe Stock alone.

The Adobe Stock Library Continues to Grow

Adobe has a unique library thanks to Fotolia. However, their library would not be what it is today if it weren’t for the contributions of stock photographers.

The Life of a Stock Photographer

In this age of digital photography, just about anyone with decent photo editing skills can take pictures and add them to microstock libraries. Many people will tell you that it’s not worth the time or effort. You can spend several hours on photo editing procedures before they are ready for library submission. On top of that, microstock agencies will not pay the photographer for ownership of the photo. Instead, when a customer purchases a license on a stock photo, the microstock agency will pay the stock photographer a royalty fee.

This means that stock photographers have to do two things. One, they have to submit high-quality photos that entice customers to buy the image. The second one is a little more demanding than the first. The stock photographer has to work quickly. They have to submit a large number of photos to increase the chances that their photo will be chosen for purchase.

It Pays to Have a Fotolia Account

As you explore the Adobe Stock website, you may notice that there is a little link at the bottom that takes you to a contributor’s page. They will tell you that you may submit your photos for inclusion in the Adobe Stock library, but you must go to Fotolia to do it. Once you go to Fotolia, simply create an account and start submitting your work.

Spread the Word

Now that you know all about Adobe Stock, its history, where it came from, and what it is, the only thing left for you to do is to pay them a visit. Take a minute and browse their library. Then compare it to any other microstock agency. You’ll notice that Adobe chose Fotolia strategically.

Adobe’s customers are primarily made up of creative professionals. Adobe catered to this and chose a library with a special artistic flair. When you’re there, simply create an account. You won’t be disappointed. Then, tell a friend about it and spread the word.

Video Footage Sale: The Shutterstock Coupon Won’t Be Here Forever

shutterstock300widthWhen people think of stock photos, they often picture a low-quality, cliché image that they see everywhere. An iconic theme that everyone has seen before is the cliché of a businessman walking on a tightrope. Stock marketing agencies have worked tirelessly in the last 10 years to shake off that stereotype. For the most part, they’ve done a good job.
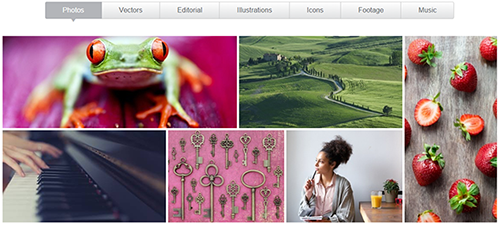
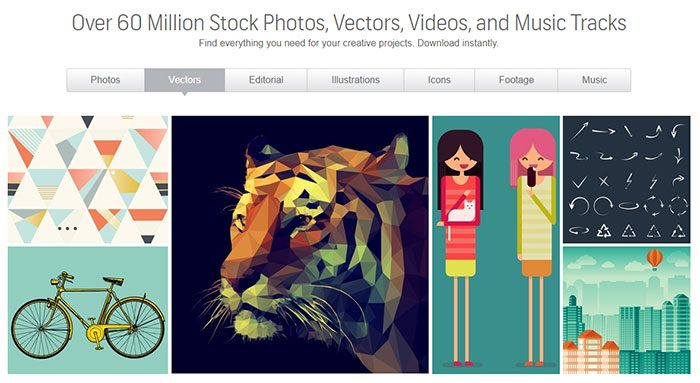
Many review sites will tell you which stock photo agencies are the best. However, just like many competing businesses, microstock agencies are not created equal. There’s this belief that microstock agencies stock nothing but images. If you were to look between the lines, you would find that some of them also stock videos. Shutterstock is one of them.

What Makes Shutterstock so Special?

On the surface, Shutterstock appears to be another stock agency competing among a sea of others. However, if you were to look between the lines, you’d noticed that they also offer stock video footage. This offering has earned Shutterstock a much larger audience (check their coupon code for 2016 here) than they would otherwise get if they offered photos alone.

The Value of Stock Video

Without stock video, you would be forced to shoot your own. My question for you is this. Why would you want to? Your time is far more valuable than this. The benefit is not worth the expense. Just to shoot your video, you would need your own video camera. Sometimes, modern smartphones can suffice. However, you will still need to edit the video for sound, lighting, and the insertion of engaging elements. Even if you have the talent, it takes time away from your job as a marketer.

Engaging elements are the parts of the video that serve to engage the customer. They can be little tidbits of video to act as a transition from one scene to the next. It can be between your title introduction and the bulk of the video. Stock video footage can mean the difference between your videos looking like they were shot by a high schooler, and your videos appearing as if you care about your audience enough to give them a pleasurable experience. As the name implies, engaging elements are the pieces of video footage you insert in your videos to keep your viewers engaged.

The Shutterstock Coupon

shutterstock-coupon-code

There is a general consensus that stock images are expensive. As stock videos spike in popularity, the same reputation will carry-over. They may be expensive, but the value far outweighs the cost.

Right now, Shutterstock is offering a limited-time coupon that gives you a 15 percent discount on all their stock videos. Before the end of the year, Shutterstock may take the coupon down. The value of this coupon extends beyond the immediate next couple of days. By taking advantage of the 15 percent discount now, you will have video credits added to your account. When you’re ready, you can choose your videos. You’re not being forced to choose videos right here and right now. This means that as you enter the new year, your video stock needs will have been met. This is Shutterstock’s way of giving you the opportunity to knock one more task off your to-do list.

Holiday Marketing and Beyond

sign-up-with-shutterstock

In your marketing efforts this year, how many videos have you utilized? If you haven’t used videos yet, you will next year. Video marketing is huge. The holidays are a time to put your best foot forward and create a festive experience for your potential customers.

The Popularity of Videos

2015 was seen as the year of videos. This claim will only become truer and more relevant as time goes on. More videos will be used in 2016 than in 2015. More people are watching more videos on mobile devices and spending less time on laptops and desktops.

Laptops and desktops have cemented themselves as permanent business tools. They are not going anywhere and anytime soon. However, consumers don’t use laptops and desktops to spend their time online. They’re using mobile devices. Honestly, nobody wants to read an article on a mobile device with a 3.5-inch screen. Videos, however, are a different story.

Videos Are Set to Surpass Articles

I’ll be the first one to say that the written word is not going anywhere anytime soon. In other words, videos are not set to replace articles. However, they are on the path to surpass article usage. Content marketing is shifting away from articles and blog posts two videos and video posts.

Articles may have their place. However, a larger part of the online audience are using videos to gather information online, find whatever it is they’re searching for and learn new things. In fact, videos are becoming the primary method utilized online to teach people, convey information and to reach new audiences. Even Facebook – with their new set of video tools – has realized this and is now becoming a major competitor against YouTube.

Spread the Word

spread-the-word-shutterstock

More and more people are using videos to convey information online. At the same time, more and more people are using videos to gather information online. If you want to reach more audiences, stay relevant to your industry, and reach new heights with your business, start using videos. Spread the word.

Should You Be Using Cheap Images?

When should you be using cheap images? Should you be using them at all? Personally, I’m an advocate for them – in the right situation. There’re situations that call for stock images and situations that the call for professional photography. Now, I’m not a photographer, so there’s no need to tell you about the weddings I haven’t photographed. However, as a marketer, here’re a few areas where you should not be using cheap images.

1. A Client’s Product

03d82923-300x200

You should never be using a cheap image in place of a client’s product. A client’s product does not have to mean something tangible. A client’s product could be a service. If your client is a carpet cleaner, you may be tempted to use a stock photo of a clean room with a clean carpet. However, as a marketer you should know better. By hiring a professional photographer who can get the lighting and clarity just right, you’re giving your clients an image where they can say “Hey, I did that.”

2. Event Marketing

pay-attention-300x200Sooner or later you’re going to get a client that will ask for your help in promoting an event. This is a 50/50 area. When showcasing things like the venue or past events (assuming that it’s a periodic event), always use photos that were taken professionally. If you’re merely coming up with some background image to let people know that it is a black-tie event, then the use of a stock photo may be welcomed. Stock photos do have the ability to set the mood – if you do it right.

3. Brand-Related Images

student-300x200At any time when a client’s public image is on the line, professional photography is always recommended. At the very least, if stock photography must be used, allow a graphic designer to weigh in on the decision. Even if it’s unintentional, marketers have still made the mistake of portraying their clients in a negative light. Although the client often has the final say, remember this one word of wisdom – the client hired you for a reason. If you feel that you need to override your client’s wishes for their own sake, do so – but tread carefully. Most clients have no problem with you overturning their decisions so long as you make them feel valued as clients.

Remember one thing – cheap images from the list here don’t always equate to cheap quality. If you can help it, never use images of cheap quality. Stock photography – if done correctly – can be seen as professional. However, this takes a skill that takes time and effort to learn. As time goes on, you’ll find that your own value goes up because you do things right.